How to Install Swimming Pool Handrails: A Step-by-Step Guide
Installing a swimming pool handrail is an important step in creating a safe, comfortable, and accessible swimming environment. Whether you are building a new swimming pool, upgrading existing pool equipment, or replacing an old handrail, proper installation helps ensure stability, durability, and long-term performance.
Stainless steel pool handrails are widely used in residential swimming pools, hotels, resorts, and commercial aquatic facilities. Their corrosion resistance, attractive appearance, and reliable construction make them a popular choice for modern swimming pool projects.
1. Why Proper Swimming Pool Handrail Installation Matters
A pool handrail provides essential support when swimmers enter or exit the water. Incorrect installation may result in unstable handrails, loose anchors, premature corrosion, and potential safety hazards.
Proper installation offers several important benefits:
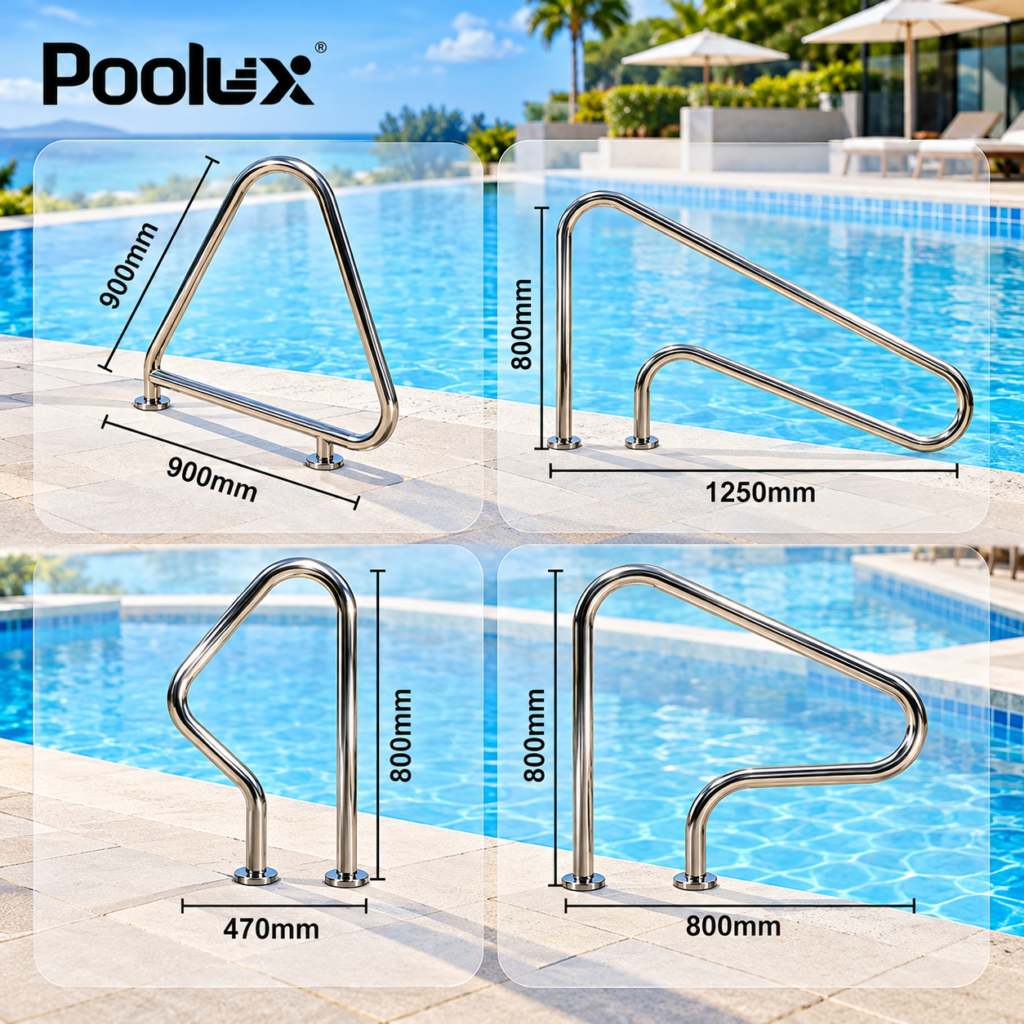
- Improved Safety: Provides stable support when entering and leaving the swimming pool.
- Long-Term Durability: Correct anchoring reduces unnecessary movement and wear.
- Better Corrosion Resistance: Appropriate materials, drainage, and maintenance help protect metal components.
- Professional Appearance: Proper positioning creates a clean, attractive poolside installation.
- Convenient Replacement: Compatible removable anchor systems simplify future handrail maintenance.
2. Tools and Materials Required for Pool Handrail Installation
Before starting your swimming pool handrail installation, prepare the necessary equipment and confirm that all components are compatible.
- Stainless steel swimming pool handrail
- Compatible pool deck anchors and wedges
- Core drilling equipment suitable for concrete
- Measuring tape and marking tools
- Shop vacuum and cleaning brushes
- Manufacturer-approved anchoring epoxy or cement
- Level and appropriate installation tools
- Required electrical bonding components
- Suitable personal protective equipment
Always review the product installation manual before beginning. Anchor dimensions, drilling requirements, curing conditions, and fastening methods may vary between manufacturers and handrail models.
3. How to Install Pool Handrails on an Existing Concrete Deck
Retrofitting a pool handrail onto an existing concrete deck is common when upgrading an older swimming pool or adding additional support near pool steps.
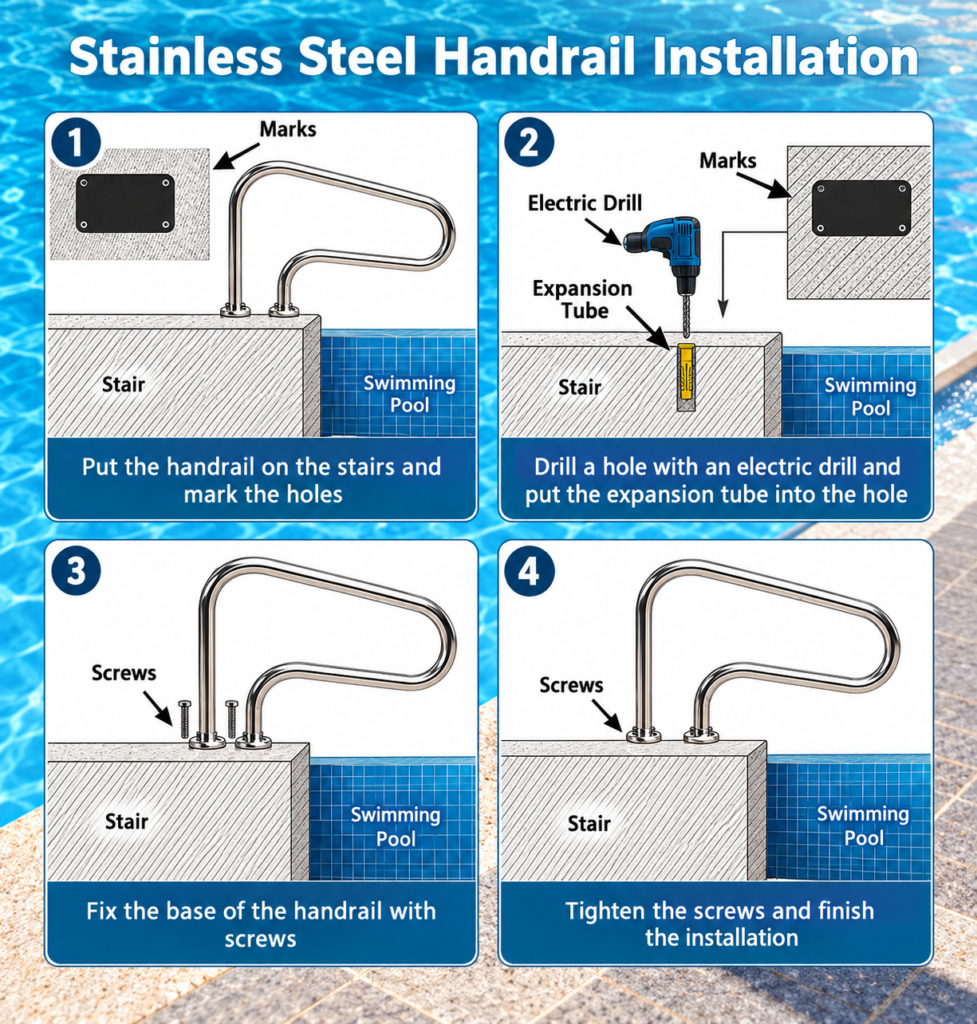
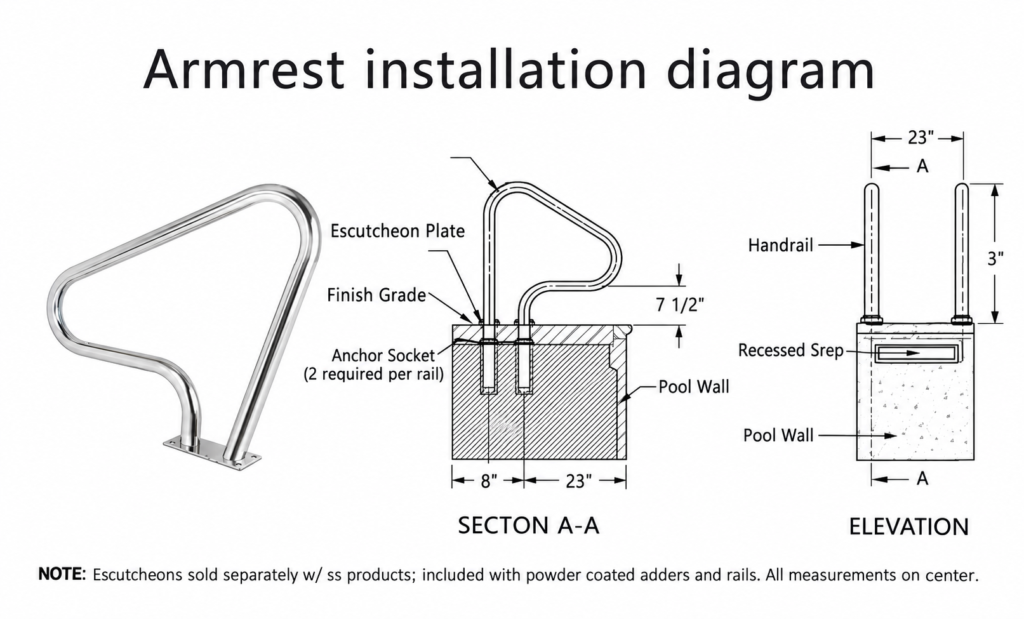
Step 1: Measure and Mark the Installation Position
Determine the correct handrail location based on the pool design, deck structure, and desired entry or exit position. Measure the distance between the handrail mounting legs and mark the corresponding anchor locations.
Step 2: Drill the Anchor Holes
Use a suitable core drill to create openings in the concrete deck according to the anchor manufacturer’s specifications.
For example, some conventional pool handrail anchor systems specify approximately 4-inch diameter holes for standard stainless steel or bronze anchors and 5-inch diameter holes for certain universal anchors. Those systems may require holes approximately 1/2 inch deeper than the anchor body.
These measurements are examples rather than universal requirements. Always follow the dimensions supplied with your selected anchor system.
Step 3: Clean the Anchor Holes
Remove drilling dust, loose concrete particles, and debris using a brush and shop vacuum. Ensure the holes meet the cleanliness and moisture requirements of the selected anchoring material.
Step 4: Position the Pool Handrail Anchors
Place each anchor into its prepared opening. For wedge-type anchors, position the wedge according to the manufacturer’s instructions. Some conventional designs require the wedge to face away from the swimming pool.
Make sure the anchor sits flush with the finished deck surface and that any designed drainage opening remains unobstructed.
Step 5: Complete the Required Electrical Bonding
Metal pool handrails and their anchors may need to be connected to the swimming pool’s equipotential bonding system. In the United States, applicable requirements are generally addressed by NEC Article 680 and locally adopted electrical codes.
Have a qualified professional verify and complete the bonding connections using approved materials and methods before the installation is permanently enclosed.
Step 6: Secure the Anchors and Allow Proper Curing
Apply the approved anchoring epoxy, cement, or grout following the product instructions. Some traditional installation systems specify cement with a minimum compressive strength of 3,000 PSI.
Allow the material to cure completely under the specified environmental conditions. Do not install or load the handrail prematurely.
Step 7: Install and Inspect the Handrail
Insert the stainless steel handrail legs into the prepared anchors. Tighten the compatible retaining wedges or fasteners according to the manufacturer’s instructions.
Check the alignment, stability, and installation quality before the pool is returned to service.
4. Choosing 304 or 316 Stainless Steel Pool Handrails
Material selection is another important consideration when installing swimming pool handrails.
| Feature | 304 Stainless Steel | 316 Stainless Steel |
|---|---|---|
| Corrosion Resistance | Good in suitable conditions | Better resistance to chloride exposure |
| Typical Applications | Selected indoor and residential pools | More demanding pool environments |
| Cost | Generally lower | Generally higher |
| Maintenance | Regular cleaning required | Regular cleaning required |
For swimming pools exposed to salt, chlorides, or demanding environmental conditions, 316 stainless steel pool handrails may provide additional corrosion resistance. However, neither stainless steel grade is completely immune to corrosion, and suitable material selection depends on the actual environment.
5. Common Pool Handrail Installation Mistakes to Avoid
- Incorrectly measuring the distance between mounting legs.
- Using incompatible anchors or fastening components.
- Installing anchors in damaged or inadequate concrete.
- Blocking designed drainage openings.
- Ignoring required electrical bonding procedures.
- Applying loads before the anchoring material has cured.
- Failing to inspect the finished handrail for movement.
A professional installation should follow both the manufacturer’s instructions and the applicable building, electrical, and swimming pool safety requirements.
6. Choose Reliable Swimming Pool Handrails for Your Project
Whether you are upgrading a residential swimming pool or developing a commercial aquatic facility, selecting the right stainless steel swimming pool handrail is essential for safety, appearance, and long-term performance.
POOLUX supplies swimming pool accessories, including 304 and 316 stainless steel pool handrails, swimming pool ladders, and related pool equipment for international customers.
For swimming pool contractors, distributors, and project buyers, our team can help you explore suitable pool handrail options based on installation requirements and project specifications.
Contact POOLUX to discuss swimming pool handrail models, available materials, product specifications, and wholesale quotations for your next pool project.
Safety Note: This article provides general installation guidance. Always follow the specific manufacturer’s instructions, applicable local codes, and qualified professional advice. For further reference, consult applicable requirements in the International Residential Code swimming pool provisions.